


How to Remove Sticky Residue from Vinyl Record Labels
Last Updated: November 1, 2026
Quick Summary
To remove sticky residue from vinyl record labels, start dry: lift the sticker corner slowly and dab edges with a dry cotton swab, stopping if the paper fuzzes. If needed, use a barely damp swab or gentle heat from a hair dryer on low, testing any solvent on a hidden spot first.
- Find the sticker first: shrink wrap, sleeve, paper label, or playing surface each need a different approach.
- Pull stickers back slowly and parallel to the label, never straight up.
- A hair dryer on its lowest setting, kept moving, softens pressure-sensitive adhesive.
- Test every solvent on a tiny hidden spot before touching the visible residue.
- Stop when paper fuzzes, print smears, or glue resists two gentle attempts.
Table of Contents
- Before You Touch the Sticker: Locate It and Read the Adhesive
- How to Clean Vinyl Record Labels Without Lifting Print or Paper Fibers
- Safe Cleaners for Vinyl Records: Water, Soap, Heat, and Solvents
- How to Remove Tape Residue from Vinyl: A Step-by-Step Method
- Paper Label vs. Vinyl Playing Surface: Two Different Jobs
- When the Label Is Already Torn, Faded, or Water-Damaged
- Aftercare, Residue Verification, and When to Stop
- Bring Your Pressing to Vyle Vinyl for a Condition Check
- Frequently Asked Questions
Before You Touch the Sticker: Locate It and Read the Adhesive
The first rule of how to remove sticky residue from vinyl record labels is simple: find the sticker before you touch it. Most damage happens because a collector starts peeling something that was never on the label in the first place.
Collectors often make the same mistake. If you are assessing a used record you bought online, these tips for buying used vinyl online help you spot adhesive or label issues before buying.
Sticker on the Sleeve, Shrink Wrap, or Center Label
Where the sticker sits decides your whole approach:
- Shrink wrap: easiest case. Cut the wrap away or peel the sticker with the plastic.
- Cardboard sleeve: risky. The printed cover can lift with the adhesive.
- Paper center label: the highest-risk spot. Paper fibers tear and ink fades fast.
A price sticker on a paper label is not the same job as a sticker on a glossy cover. Treat them separately.
Adhesive Types and What They Mean for Removal
Not all glue behaves the same way. A removable sticker is designed to lift cleanly. Old price stickers, packing tape, and mailing labels usually are not.
Here is how the common types stack up:
| Adhesive Type | Typical Source | Removal Difficulty | Best First Move |
|---|---|---|---|
| Removable adhesive | Modern price stickers | Low | Slow dry peel |
| Permanent pressure glue | Older price stickers | Medium | Gentle heat |
| Tape residue | Packing or mailing tape | High | Solvent, tested first |
| Aged yellowed glue | Decades-old stickers | Very high | Damp cloth, patience |
Test a tiny corner before committing. If the paper starts to fuzz, stop.
How to Clean Vinyl Record Labels Without Lifting Print or Paper Fibers
Cleaning a paper label is a game of restraint. The goal is to lift glue, not paper.
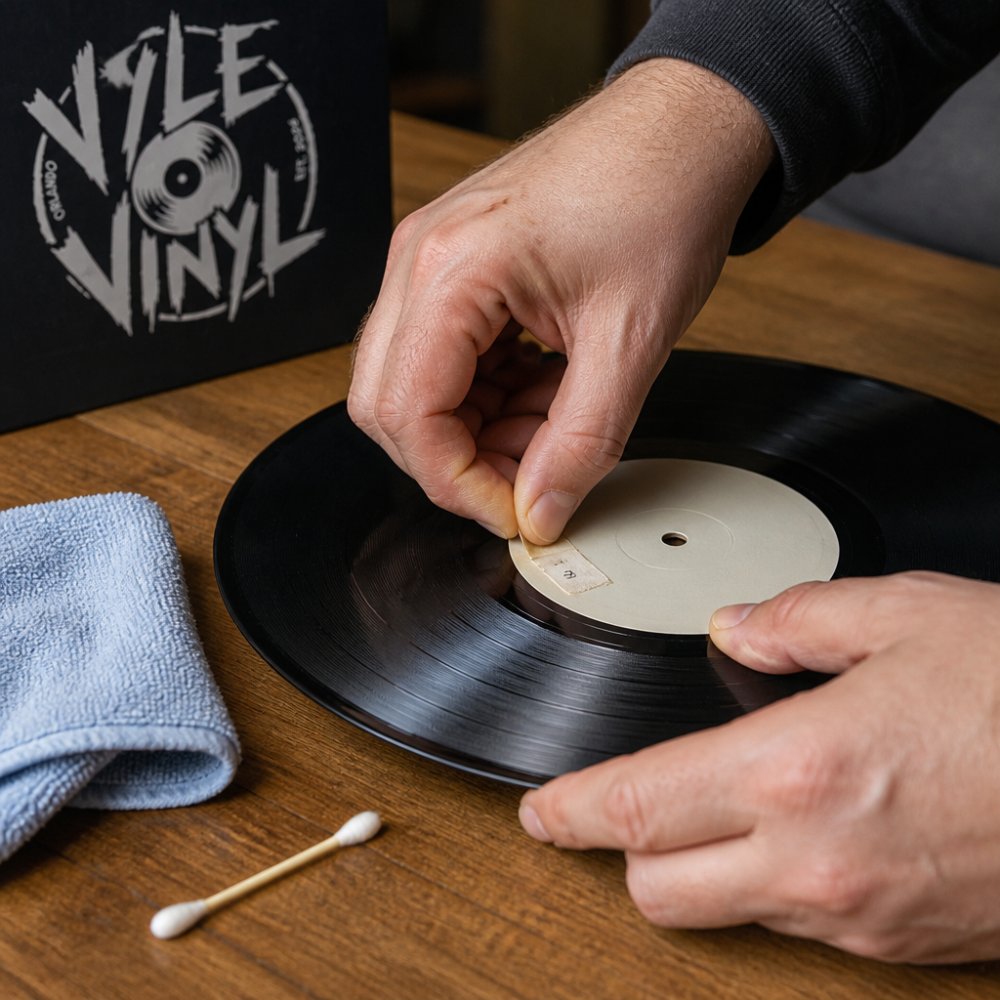
Work in good light. Keep the record flat on a clean, soft surface.
Dry-First Methods: Lift, Peel, and Dab Slowly
Always start dry. Wetting glue before you understand it can drive adhesive into the paper.
- Slip a fingernail under one corner and lift at a shallow angle
- Pull back slowly, parallel to the label, never straight up
- Dab stubborn edges with a dry cotton swab
A common mistake is pulling fast. Slow, steady pressure lets the adhesive release instead of grabbing fibers. If the sticker tears, leave the remainder and reassess.
Safe Cleaners for Vinyl Records: Water, Soap, Heat, and Solvents
Safe cleaners for vinyl records fall into four families: water, mild soap, gentle heat, and solvents. Each has a place, and each can ruin a paper label if you use too much of it or leave it in contact too long. The difference between a clean label and a stained one is usually the carrier (cloth, swab, or paper towel), the amount applied, and how fast you dry.
Work in good light with the record flat on a clean, soft surface. Keep every liquid on the label side only, and never let it run toward the spindle hole or the edge where the label meets the grooves.
Water and Mild Soap: The Lowest-Risk Starting Point
Water can be a first attempt for water-tolerant labels, but paper labels are not all water-tolerant. Dampen a soft lint-free cloth or a cotton swab, wring it until it is barely damp, and dab the residue rather than wiping across the print.
- Use a swab for small spots so liquid stays where you put it.
- Dab, lift, and check. Do not scrub back and forth across the label text.
- Dry right away. Standing moisture is what wrinkles paper and lifts ink.
If the label darkens or the paper starts to pill under a damp swab, stop and let it dry completely before deciding whether to continue.
Gentle Heat: Softening Glue Without Cooking Paper
Gentle heat can soften pressure-sensitive adhesive so it releases more easily. A hair dryer on the lowest setting, held well back and kept moving, warms the sticker without scorching the label.
A common pattern is to warm for a few seconds, test the corner, and repeat. If the label feels hot to the touch or the paper starts to curl, you are too close or too long.
Solvent Compatibility and Safety Guide
Solvents remove stubborn residue, but they attack paper, print, and some label coatings. Test first, always, on a tiny hidden spot near the edge of the label or under the sticker itself.
| Cleaner | Safe on Paper Label? | How to Apply | Watch For |
|---|---|---|---|
| Water | Usually | Barely damp swab, dab, dry fast | Paper pilling, ink bleeding |
| Mild soap and water | Sometimes | Weak mix on a damp cloth, wipe dry | Dull film, softened paper |
| Gentle heat | Usually | Hair dryer on low, kept moving | Curling, scorching |
| Lighter fluid | Rarely | Tiny amount on a swab, test hidden spot | Ink lift, discoloration, strong fumes |
| Adhesive remover | Rarely | Small amount on a swab, test first | Staining, coating damage |
A word of caution: lighter fluid and adhesive removers can discolor paper and lift print. Applying a solvent directly to a paper label can bleed ink and leave a permanent stain, so put a tiny amount on a swab, not on the label, and work from the outside of the residue inward.
Matching the Cleaner to the Label
A glossy or coated label tolerates a damp swab better than a matte, uncoated paper label, which drinks liquid and pills quickly. Aged labels with already-faded print are the least forgiving: skip solvents and water entirely and stay with dry methods and gentle heat. When in doubt, use the least aggressive cleaner that loosens the residue and stop as soon as the paper shows any sign of distress.
How to Remove Tape Residue from Vinyl: A Step-by-Step Method
Tape residue is the stubborn one. Packing tape and mailing labels leave a gummy film that grabs dust and never peels in one piece. Here is the method we use, in order.
- Lift the tape edge with a fingernail, working slowly.
- Warm the residue with a hair dryer on low, held well back.
- Dab with a damp cloth to loosen the film.
- Test a solvent on a hidden spot before touching the visible area.
- Wipe gently with a soft cloth, following the label's grain.
- Dry completely before the record goes back in its sleeve.
If the residue sits on the vinyl playing surface rather than the label, treat it as a separate cleaning job and keep solvents off the grooves.
Paper Label vs. Vinyl Playing Surface: Two Different Jobs
Paper and vinyl demand different care. A paper label is porous and absorbs liquid. Vinyl is smooth and non-porous, but it scratches easily and holds static.
On a paper label, less is more. Dab, do not wipe broadly. Keep liquid away from the spindle hole so it does not wick under the label.
On the playing surface, residue removal is a cleaning task, not a scraping one. For safe, step-by-step guidance on cleaning the record itself, follow a dedicated vinyl cleaning guide.
When the Label Is Already Torn, Faded, or Water-Damaged
Sometimes the damage is already done, and the job changes from removing residue to preventing further harm. A torn, faded, or water-stained label is a preservation problem, not a cleaning problem. The right move is often to leave the sticker alone.
Read the Label Before You Decide
Look at three things: the paper itself, the print, and the adhesive. If the paper is brittle, lifting at the edge, or already separating from the vinyl, any pulling risks taking a chunk of label with it. If the print smears when you breathe on it or touch it with a dry swab, it will not survive a solvent. To judge how much existing label damage affects the record's condition and value, see this step-by-step guide to grading rare vinyl condition.
- Torn label: do not pull at loose paper. Stabilize the loose edge flat and leave the sticker if removal risks more tearing.
- Faded print: avoid solvents and water. Dry methods and gentle heat only, and stop at the first sign of smearing.
- Water damage: let it dry flat and never rub a damp label. Once dry, reassess whether any residue removal is worth the risk.
When to Stop and Leave the Sticker
Stopping is a legitimate outcome, especially on collectible pressings. Stop when the paper starts to fuzz or lift, when print begins to smear, when the adhesive will not budge after two gentle attempts, or when you feel tempted to scrape harder. A sticker left in place is a small cosmetic flaw; a torn or stained label is a permanent one.
Aftercare, Residue Verification, and When to Stop
Aftercare matters as much as removal. Let the record air-dry fully before it goes back in the sleeve. Any leftover moisture can warp paper and feed mold.
Check your work in raking light. Tilt the label toward a lamp and look for a dull film or a tacky spot. Run a clean finger lightly across it. If it drags, residue remains.
Here is when to stop:
- The paper starts to fuzz or lift
- Print begins to smear
- The adhesive will not budge after two gentle attempts
Residue on the label can also migrate onto the stylus during playback. To make sure the stylus and playback aren't affected by leftover residue or debris, follow these steps to properly clean a vinyl record stylus.
Bring Your Pressing to Vyle Vinyl for a Condition Check
Some labels are past the point where home methods help. A rare horror or metal pressing with a fragile label deserves a second opinion before you risk it.
Vyle Vinyl is a veteran-owned shop in Orlando built for collectors of horror, punk, heavy metal, and underground releases. We curate rare and limited pressings and take part in local record shows and flea markets.
Search the Vyle Vinyl site to find your next cult favorite.
Frequently Asked Questions
Can dish soap remove sticker residue from a vinyl record label?
A drop of mild dish soap in water can help lift light adhesive, but paper labels absorb moisture fast. Dampen a cloth, not the label, and dab rather than scrub. Keep the spindle hole and grooves dry, and blot immediately with a soft cloth. For older or porous labels, skip the soap and try dry peeling or gentle heat first.
Can rubbing alcohol damage a vinyl record label?
Yes. Isopropyl alcohol can bleach or dissolve the inks and paper fibers on a center label, and it can dull the vinyl surface if left to sit. Test a tiny amount on an inconspicuous edge first. If the label is vintage, printed with metallic ink, or already faded, use the least aggressive method and stop as soon as the residue loosens.
How do I remove old, stubborn adhesive from a record label without smearing it?
Work from the outside edge inward and lift rather than rub. Soften the glue with warm air from a hair dryer held at a distance, then press a piece of adhesive tape onto the residue and peel it away. Repeat with fresh tape rather than scrubbing, which spreads the glue across the paper and pushes it toward the grooves and spindle hole.
How should I dry a record label after cleaning it?
Blot, do not wipe. Press a dry, lint-free soft cloth or paper towel against the label for a few seconds, then let the record air dry on its edge in a well-ventilated spot away from direct sun. Never stack a damp record, and never use heat to speed drying, since warm air softens both the label adhesive and the vinyl.
