


7 Steps to Properly Clean a Vinyl Record Stylus
Last Updated: October 25, 2026
Quick Summary
To clean a vinyl record stylus, stop the platter, cue and support the arm, then draw a soft stylus brush forward from the tip away from the cantilever in two or three light passes. Use almost no pressure, never brush side to side, and add a polymer gel cleaner weekly or when buildup appears.
- Dry brush the stylus before every side to remove loose dust before it becomes sticky residue.
- Apply liquid stylus fluid sparingly to a brush, never directly to the stylus, and let it dry fully.
- Never blow on the stylus, since breath carries moisture and saliva that leave residue.
- Replace a gel pad once it looks dirty, because a loaded pad redeposits grime.
- If distortion persists after a proper clean and visual check, the problem is not dirt.
Table of Contents
- Why a Clean Stylus Protects Your Records and Your Sound
- How to Tell When Your Stylus Needs Cleaning
- Safe Stylus Cleaning Methods: What Works and What to Avoid
- How to Use a Stylus Cleaning Brush Without Causing Damage
- Stylus Cleaning Gel: When a Polymer Cleaner Makes Sense
- How Often to Clean a Stylus: A Frequency Guide by Listening Habits
- Troubleshooting: Is Your Stylus Dirty or Damaged?
- Stock Your Cleaning Kit at Vyle Vinyl
- Frequently Asked Questions
Why a Clean Stylus Protects Your Records and Your Sound
Knowing how to clean a vinyl record stylus is the single cheapest form of insurance for your collection. Dust, lint, and sticky residue build up on the stylus tip, and that grit grinds against the record groove with every spin. Over time, that means distortion, mistracking, and permanent wear on records you can't replace. At Vyle Vinyl, we've handled enough used collections to know the tell: a stylus caked in debris usually comes with a stack of records that sound dull and noisy. The good news is that proper cleaning takes under a minute per side and costs almost nothing. Below, we'll walk through the exact steps, the tools worth buying, and the methods to avoid. If you also want to protect the records themselves, our guide on how to clean vintage vinyl records covers that side of the equation.
How to Tell When Your Stylus Needs Cleaning
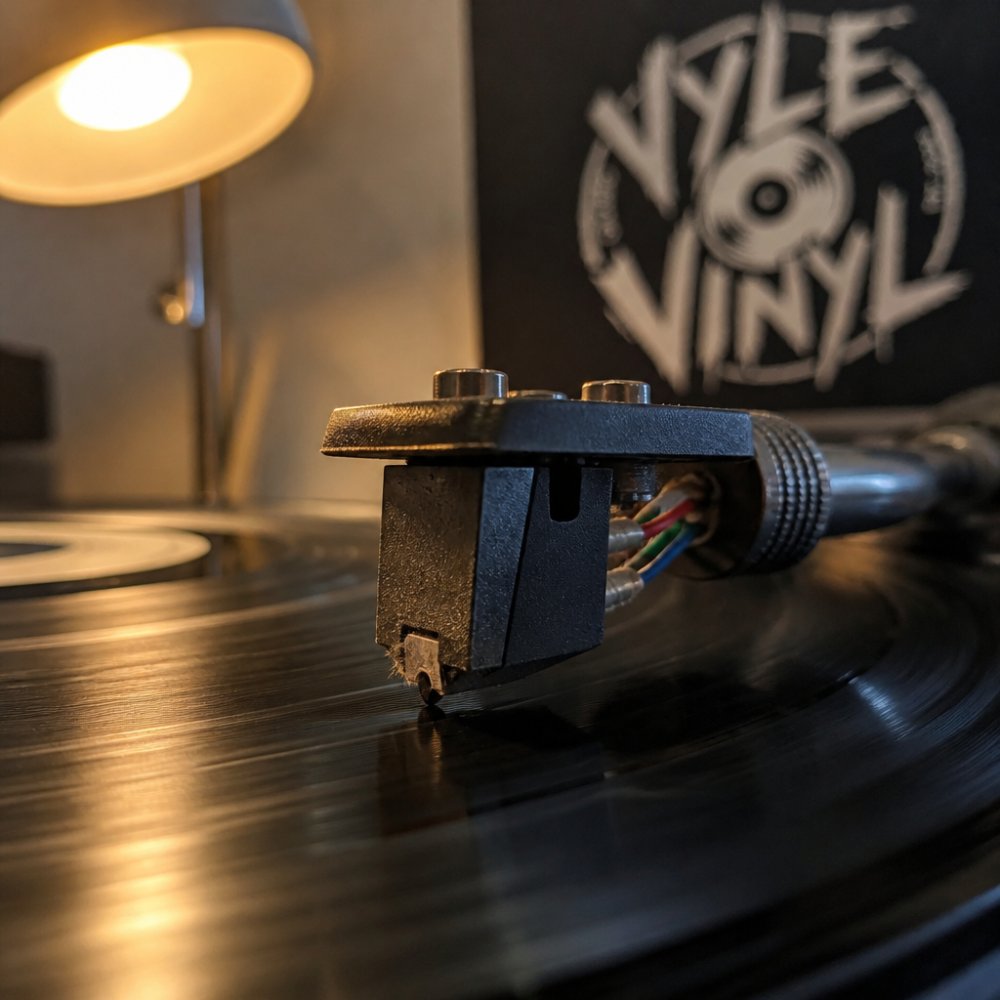
Your stylus needs cleaning when you spot visible dust on the tip, hear crackle or sibilance that wasn't there before, or notice debris collecting on the cantilever. A quick visual check before each session catches most problems. Look for these signs:
- A gray fuzz ball clinging to the stylus tip
- Hissing or distortion on high frequencies
- Muffled vocals on records that used to sound clean
- Lint strands wrapped around the cantilever
- Static pops that get worse as the side plays
Many collectors clean the stylus before every side and brush the record too. That habit alone prevents most buildup. According to the Library of Congress guide to preserving sound recordings, dust and dirt are among the leading causes of record and playback wear, which is why routine cleaning matters more than any single deep clean.
Safe Stylus Cleaning Methods: What Works and What to Avoid
The safe stylus cleaning methods are dry brushing, a polymer gel cleaner, and a small amount of approved stylus fluid. Skip anything harsh. Isopropyl alcohol, household cleaners, and blowing on the tip can damage the cartridge or push debris deeper into the works.
Dry Brushing: The First Line of Defense
Dry brushing removes loose dust before it becomes sticky residue. Use a soft stylus brush with light strokes, front to back. Never brush side to side, since that can bend the cantilever. Do this before every side.
Liquid Stylus-Cleaning Fluid: Dilution and Dangers
Liquid stylus-cleaning fluid should be used sparingly and only as directed. Apply a tiny drop to a brush, never directly to the stylus, and let it dry fully. Too much fluid can wick up the cantilever and leave residue. Watch out: alcohol-based fluids can soften some cartridge adhesives, so check your cartridge maker's guidance first.
How to Use a Stylus Cleaning Brush Without Causing Damage
A stylus brush is the safest tool you own, but it is also the one most often used wrong. The tip is a tiny polished point mounted on a thin cantilever, and that cantilever is the part that fails when pressure or direction goes wrong. Brush technique is really cantilever-handling technique.
The precise procedure
- Stop the platter and cue the arm up. Work with the record stationary so a slip cannot drag the tip across a groove.
- Rest the arm on its support so the stylus is stable and you are not chasing a moving target.
- Hold the brush at a shallow angle behind the stylus, with the bristles pointing toward the tip and away from the arm.
- Draw the brush forward, away from the cantilever, in two or three light passes. Front-to-back only. Never side to side, and never back toward the arm.
- Use almost no pressure. The bristles should barely touch the tip. You are lifting dust, not scrubbing it off.
- Inspect with a magnifier, a jeweler's loupe or a phone macro lens works, and repeat once only if debris remains.
Why direction and pressure matter
Side-to-side brushing is the classic mistake. The cantilever is designed to flex along one axis during playback; pushing it sideways loads it in a direction it was not built for, and repeated sideways pressure is a common route to a bent or misaligned tip. Pressing hard to "dig out" dirt does the same thing vertically: it compresses the suspension and can push debris farther up the cantilever instead of off the tip. Light, forward strokes every time.
Brush choice and care
A soft carbon-fiber or fine-bristle stylus brush is the standard choice. Keep the brush itself clean: tap it out or rinse it according to the maker's instructions, and store it covered so it does not become a dust source. A dirty brush just moves grime around.
Manufacturer guidance comes first
Cleaning methods vary by cartridge and stylus assembly. Some makers specify a particular brush angle, forbid liquids entirely, or supply their own cleaning accessory. Before you adopt any technique, especially anything involving fluid or a contact cleaner, check the guidance that came with your cartridge. When in doubt, dry brushing with light forward strokes is the conservative default.
Stylus Cleaning Gel: When a Polymer Cleaner Makes Sense
A stylus cleaning gel, also called a polymer cleaner, makes sense when dry brushing isn't enough. You lower the stylus onto the gel pad, let it lift the debris, and raise it back up. The gel pulls out sticky residue that a brush can't reach. Use it weekly or whenever you notice buildup. Replace the pad when it looks dirty, since a loaded pad just redeposits grime.
How Often to Clean a Stylus: A Frequency Guide by Listening Habits
How often to clean a stylus depends on how much you play and how dusty your room is. Here's a practical schedule:
| Listening Habit | Dry Brush | Gel Cleaner | Fluid Clean |
|---|---|---|---|
| Casual (a few sides a week) | Before each side | Monthly | Rarely |
| Regular (daily play) | Before each side | Every two weeks | Monthly |
| Heavy (hours daily, pets, carpet) | Before each side | Weekly | Every two weeks |
Brush the record too. A clean record surface means less debris reaches the needle in the first place.
Troubleshooting: Is Your Stylus Dirty or Damaged?
Most playback problems that send people hunting for a new stylus are actually cleaning problems. The trick is to separate removable buildup from wear or damage with a short, repeatable check rather than guessing.
Step 1: Clean, then re-test
Clean a vinyl record stylus carefully with the dry-brush method, then play the same passage that sounded wrong. If the distortion, sibilance, or channel imbalance improves or disappears, the cause was buildup. If nothing changes after a proper clean, keep going.
Step 2: Inspect under magnification
Use a loupe or a phone macro lens and look at the tip from a couple of angles. What you are looking for:
- Removable buildup: a gray or fuzzy mass sitting on the tip or wrapped around the cantilever. This is debris and should come off with brushing or a gel cleaner.
- Sticky residue: a dark, gummy film that brushing will not lift. A polymer gel cleaner is the right next step.
- Wear or damage: a flattened, chipped, or asymmetrical tip, or a cantilever that looks bent or skewed. Cleaning will not fix this.
Step 3: Compare channels and tracking
A dirty stylus tends to affect both channels roughly evenly and often clears up mid-side as debris works loose. A damaged or worn tip more often shows a persistent channel imbalance, distortion that gets worse toward the inner grooves, or skipping that survives a clean. If those symptoms persist, stop playing records, a worn tip can carve grooves and turn a stylus problem into a record problem.
What cleaning will not solve
Cleaning removes contamination; it does not restore a worn tip, fix a misaligned assembly, or correct a tracking-force problem. If distortion or skipping persists after a careful clean and a visual check, the issue is beyond cleaning, and continuing to play records risks damage to the records themselves.
Stock Your Cleaning Kit at Vyle Vinyl
A simple kit goes a long way: a stylus brush, a gel pad, and a soft cloth for the record surface. We keep a record cloth on hand for wiping dust off records before and after play, and it pairs well with a brush routine. Stop by our Orlando shop or search our stock online to find the pieces you need. Clean your stylus before every side, and your records will reward you with quieter surfaces and longer life.
Frequently Asked Questions
How often should you clean a record stylus?
Brush the stylus before every side and after every playback session, which takes only seconds. Use a gel or polymer cleaner about once a week if you play records daily. If you listen only on weekends or in a dusty room, a deeper clean every two to four weeks is enough. Increase frequency if you notice distortion, sibilance, or visible dust on the cantilever.
Which tools are safe for cleaning a vinyl record stylus?
Stick to a soft stylus brush, a gel or polymer cleaner, and a small amount of stylus-cleaning fluid applied with a brush, never poured directly. A record cloth can wipe the cartridge body and headshell area. Avoid cotton swabs, paper towels, and household cleaners, which can leave fibers or solvents on the stylus tip and damage the cantilever.
Should you brush a stylus from front to back?
Yes. Brush from the back of the cartridge toward the front of the stylus, using light strokes with gentle pressure. This direction flicks dust away from the tip rather than pushing it into the groove contact point. Never brush side to side or press hard, since the cantilever is fragile and can bend or snap.
Can a dirty stylus affect sound quality?
A dirty stylus adds distortion, reduces audio clarity, and can cause tracking issues, especially in loud passages. Built-up debris and sticky residue prevent the stylus tip from sitting properly in the record groove, which dulls high frequencies and increases wear on both the stylus and the record surface. A quick brush before each side prevents most of this.
Keeping a stylus clean is a small habit with a big payoff, and it's one we're glad to help you build. Vyle Vinyl is veteran owned and stocks a curated selection of horror, punk, and metal vinyl alongside the care tools collectors ask for. Search our shop to find your next pressing, and let us help you keep every record sounding its best.
