

How to Clean Vintage Vinyl Records: Safe Step Guide
Table of Contents
- What You'll Need Before You Clean Vintage Vinyl
- Step-by-Step: How to Clean Vintage Vinyl Records Safely
- The Best Vinyl Record Cleaning Kit for Vintage Pressings
- DIY Vinyl Record Cleaning Solution: Safe Recipes and Risks
- How to Store Vintage Vinyl Records to Prevent Future Dust
- Restoration vs. Cleaning: When to Use a Record Cleaning Machine
- Post-Cleaning Stylus Care and Environmental Storage Conditions
- Conclusion
- Frequently Asked Questions
Last Updated: September 14, 2026
What You'll Need Before You Clean Vintage Vinyl
Knowing how to clean vintage vinyl records starts with the right supplies. Older records carry decades of dust, mold, and groove debris, and the wrong tool can grind that debris deeper or damage the surface.
Here's what to gather before you touch a single record:
- Carbon fiber brush for dry dust removal between plays
- Microfiber cloths (at least two, kept clean and lint-free)
- Distilled water, never tap water, which leaves mineral residue in the groove
- A mild record cleaning solution or surfactant-based cleaner
- A labeled spray bottle if you mix your own solution
- Inner sleeves and outer sleeves for storage after cleaning
- A soft lint-free drying cloth or drying rack
At Vyle Vinyl, we handle everything from rare horror pressings to underground punk and metal releases, and groove condition often decides whether a record plays clean or crackles through every quiet passage. The supplies above cover dry and wet cleaning, so you can match the method to the record's condition.
Step-by-Step: How to Clean Vintage Vinyl Records Safely
Cleaning a vintage record safely means removing dust and debris without scratching the groove or stripping the vinyl's surface. This process works for most pressings, from 33/45 RPM albums to fragile 78s, though you'll adjust pressure for older, more brittle discs.
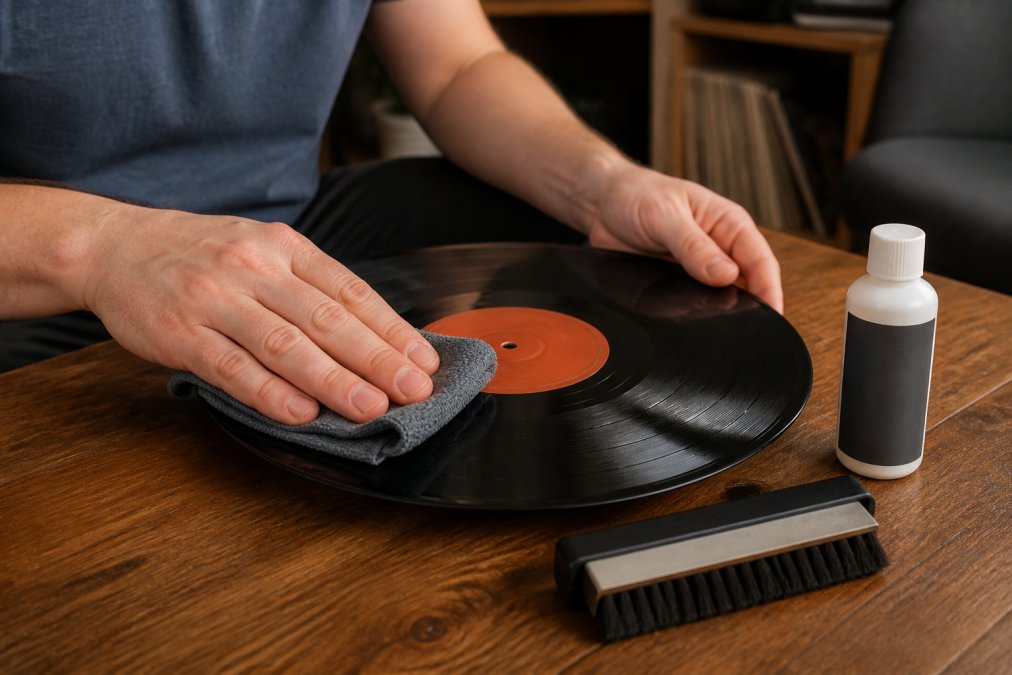
Work on a clean, flat surface with good lighting. Handle the record only by its edges and label, never the playing surface.
Step 1: Dry Dust Removal with a Carbon Fiber Brush
A carbon fiber brush removes loose dust and reduces static charge before any liquid touches the record. Hold it lightly against the spinning record and let the bristles lift debris rather than pressing down.
A common mistake is dragging the brush across a stationary record, the bristles need rotation to sweep dust toward the edge. For heavy surface dust, a second pass with a microfiber cloth catches what the brush loosens.
Step 2: Wet Cleaning with Distilled Water and Solution
Wet cleaning lifts debris dry methods leave behind, including mold and mildew spores deep in the groove. Apply your record cleaning solution with a microfiber cloth or dedicated brush, working in a circular motion that follows the groove rather than crossing it.
Keep the label dry. On a particularly dirty record, work in sections and replace your cloth as it picks up residue.
Step 3: Rinse, Air Dry, and Inspect the Grooves
Rinse with distilled water to remove leftover surfactant, then air dry on a clean rack or lint-free surface. Skip the towel-dry shortcut; wiping a wet record pushes residue back into the groove.
Once dry, hold the record under bright angled light. A clean groove reflects evenly; a hazy or streaky surface means residue remains and needs another rinse.
The Best Vinyl Record Cleaning Kit for Vintage Pressings
The best vinyl record cleaning kit for vintage pressings includes a carbon fiber brush, microfiber cloths, a mild solution, and distilled water. Kits built for modern pressings sometimes use stiffer brushes or stronger solvents that are too aggressive for brittle 78s or worn LPs.
When you're choosing a kit, look for these qualities:
- Soft bristles that lift dust without abrading the groove
- pH-neutral or mild solution that won't degrade polyvinyl chloride over time
- Reusable microfiber instead of disposable wipes
- A rinse component, since cleaning without rinsing leaves residue behind
For collectors in Central Florida, humidity is a real factor, a kit with proper drying and storage supplies matters as much as the cleaning tools.
DIY Vinyl Record Cleaning Solution: Safe Recipes and Risks
A DIY vinyl record cleaning solution typically combines distilled water with a small amount of surfactant and, in some recipes, isopropyl alcohol. What separates a solution that safely lifts grime from one that permanently hazes a vintage pressing is chemistry, how each ingredient interacts with the polyvinyl chloride (PVC) compound the record was pressed from.
Why Vintage Vinyl Reacts Differently to Solvents
Not all PVC is the same. Records pressed in different eras used different plasticizer packages, stabilizers, and filler ratios. Plasticizers migrate out of the PVC over decades, which is why a 1960s pressing feels different under the stylus than a modern 180-gram reissue (pubmed.ncbi.nlm.nih.gov). Once they've leached, the surface is more porous and more reactive.
Isopropyl alcohol is the ingredient most DIY recipes get wrong. At high concentrations this polar solvent attacks the plasticizer-starved surface layer of an older record, leaving a dull, grayish haze no rinsing reverses. The damage is cumulative, one strong alcohol clean may survive, but repeated exposure accelerates it.
A common rule of thumb is to keep isopropyl alcohol at or below roughly 10% by volume on any vintage pressing, and skip it entirely on 78s (loc.gov). Shellac-based 78 RPM records, not PVC at all, are damaged by alcohol on contact, sometimes within seconds (loc.gov). If you're unsure whether a disc is shellac or vinyl, treat it as shellac.
A Conservative Working Recipe
For a standard 33/45 RPM vintage LP, a low-risk mix is:
- 1 cup distilled water as the base
- 2-4 drops of a mild, fragrance-free surfactant (a dedicated record-cleaning concentrate is safer than dish soap)
- Optional: no more than 1-2 tablespoons of 91% isopropyl alcohol per cup if the record has greasy or oily residue
- A drop of a rinse aid is not necessary if you rinse with plain distilled water afterward
Mix in small batches. Label the bottle with the mix date. A solution sitting for weeks can grow biofilm that you then wipe directly into the groove.
Ingredients to Never Use
- Dish soap, even "mild" formulas contain dyes, fragrances, and degreasers that leave a film in the groove
- Glass cleaner, ammonia and surfactants are aggressive on PVC and leave residue
- Rubbing alcohol, often 70% isopropyl with added oils and fragrance; the additives are the problem
- Tap water, dissolved minerals and chlorine leave deposits that attract new dust
- Any product with a scent, fragrance compounds are oils, and oils in a groove are a dust magnet
Testing Before You Commit
Before applying any DIY solution to a record you care about, test on the least valuable pressing in your collection with a similar era and surface condition. Apply a small amount near the run-out groove, let it dry, and inspect under bright angled light. If the surface looks duller or cloudier than the untreated area, reformulate.
How to Store Vintage Vinyl Records to Prevent Future Dust
Storing vintage vinyl correctly prevents the dust, static, and environmental damage that cleaning is meant to fix. Clean records go into fresh inner sleeves, then outer sleeves, then onto a shelf where they stand vertically rather than leaning.
Key storage practices:
- Replace old paper inner sleeves with anti-static or archival sleeves
- Store records vertically, never stacked flat, to avoid warping
- Keep shelves away from direct sun and heat sources
- Control humidity to prevent mold and mildew growth
- Use outer sleeves to block dust from settling on the jacket and record
Environmental conditions matter as much as the sleeves: a cool, dry, stable space keeps vinyl flat and mold-free, while a damp garage or hot attic accelerates warping and surface noise.
Restoration vs. Cleaning: When to Use a Record Cleaning Machine
A record cleaning machine is worth using when a record has deep-set grime, mold, or years of debris manual cleaning can't reach.
Cleaning vs. Restoration: Two Different Problems
A Diagnostic Sequence for Thrift-Store Finds
Machine Types and What They Actually Do
When a Machine Is Worth It, and When It Isn't
A machine is not worth it when:
Post-Cleaning Stylus Care and Environmental Storage Conditions
A quick post-clean routine keeps everything in shape:
Conclusion
Frequently Asked Questions
What is the safest way to clean old vinyl records?
The safest method uses a two-step process: first, remove loose dust with a carbon fiber brush, then wet clean with a solution of distilled water and a small amount of isopropyl alcohol (no more than 10-15%). Apply the solution with a microfiber cloth, rinse with pure distilled water, and air dry. Avoid abrasive cloths or household cleaners that can damage the groove and leave residue, causing surface noise and crackle.
Can WD-40 clean vinyl records?
No. WD-40 is a petroleum-based lubricant, not a record cleaner. It leaves an oily residue that attracts dust, clogs the groove, and can permanently degrade polyvinyl chloride. It may also damage the stylus and cause playback issues. Stick to purpose-made record cleaning solutions or a simple distilled water and isopropyl alcohol mix for safe results.
What is the best cleaner for vinyl records?
The best cleaner depends on the record's condition. For routine cleaning, a carbon fiber brush and a solution of distilled water with a drop of surfactant work well. For deeper grime or mold, use a dedicated vinyl record cleaning solution with a small percentage of isopropyl alcohol. Always avoid alcohol on 78 RPM shellac records, as it can dissolve the material. A record cleaning machine is best for heavily soiled or valuable pressings.
Do I need a professional record cleaning machine?
Not for every record. A manual wet cleaning with a microfiber cloth and distilled water handles most dust and light grime. A record cleaning machine is worth it for deep cleaning, restoring thrift-store finds, or maintaining a collection of rare pressings. If you clean vintage vinyl often, a machine saves time and reduces the risk of residue left by hand drying.